Why do tech leaders need to be problem solvers?
There is no shortage of problems in tech: bugs, incidents, breakdowns, security breaches, slowdowns, misunderstandings with product teams, project delays, technical debt, etc. And the impacts are far from insignificant. Most of the time, they have a direct impact on customers (dissatisfaction, risk of churn), employees (stress), and ultimately the company (productivity, falling behind the competition).
Tech leaders have to deal with these issues on a daily basis with their teams. However, it’s difficult to have answers to everything. Above all, it’s essential to involve all individual employees in solving these problems, otherwise you risk becoming the bottleneck yourself. That’s why tech leaders need to be good problem solvers who are able to coach their teams. And as a bonus, solving problems also develops the expertise of the teams.
Job offers for tech leaders often include problem-solving skills, which are also considered a key skill by the World Economic Forum:
« Top missing skill is complex problem solving »
World Economic Forum,2019
In this article, I will outline the key steps of a four-step problem-solving process based on the rigorous PDCA approach. This approach comes from lean management, and I will apply it here to software engineering with a few concrete examples. Personally, I have been using it almost systematically for about ten years now, while coaching my teams to think this way.
Our brain plays tricks on us
To begin with, let’s take a look at how problems are solved in different countries. Many of you are familiar with this cartoon funny illustration. I invite you to look at the different stages:
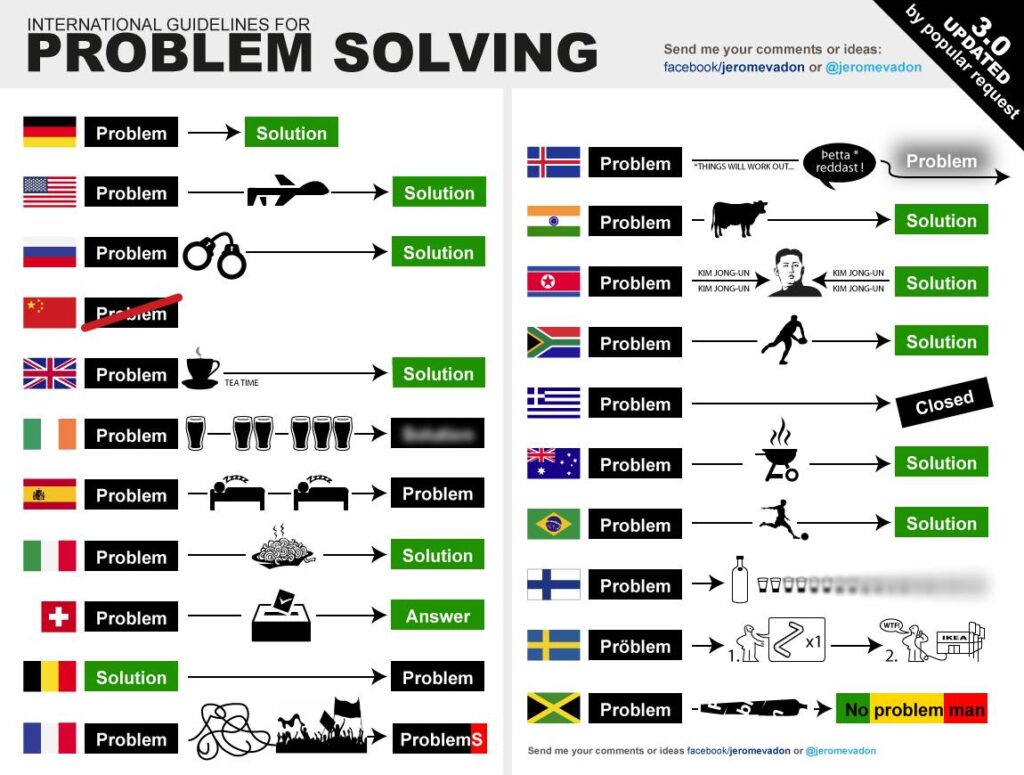
(c) Jérôme Vadon – https://www.facebook.com/jeromevadon?__tn__=-
What do you notice?
Beyond its humorous aspect, in almost every country, we always move from a problem directly to a solution.
This approach suits our brain, which tends to jump on ready-made solutions rather than really thinking about the cause of the specific problem we need to solve. This is what we call cognitive biases, shortcuts that our brain takes to avoid consuming too much energy.
Let’s illustrate these biases with an example from everyday life outside of a professional context:
If my problem is that I feel overweight, my brain may play tricks on me (bias) and recommend that I stop eating cheese, for example. Will that work?
Maybe… maybe a little, maybe not at all…
In this example, we are following the exact pattern: Problem → Solution
And to return to IT, let’s imagine that we delivered a new version that still contained numerous bugs and defects that were discovered late by users. We ask the question:
What can we do to improve the quality of our deliveries and avoid these bugs?
I often hear:
We need more testing! We could use one more person for testing because they left a lot of bugs!
Once again, our brain is playing tricks on us: Problem → Solution
Pour démonter ce biais, prenons l’exemple de la construction dans le bâtiment.
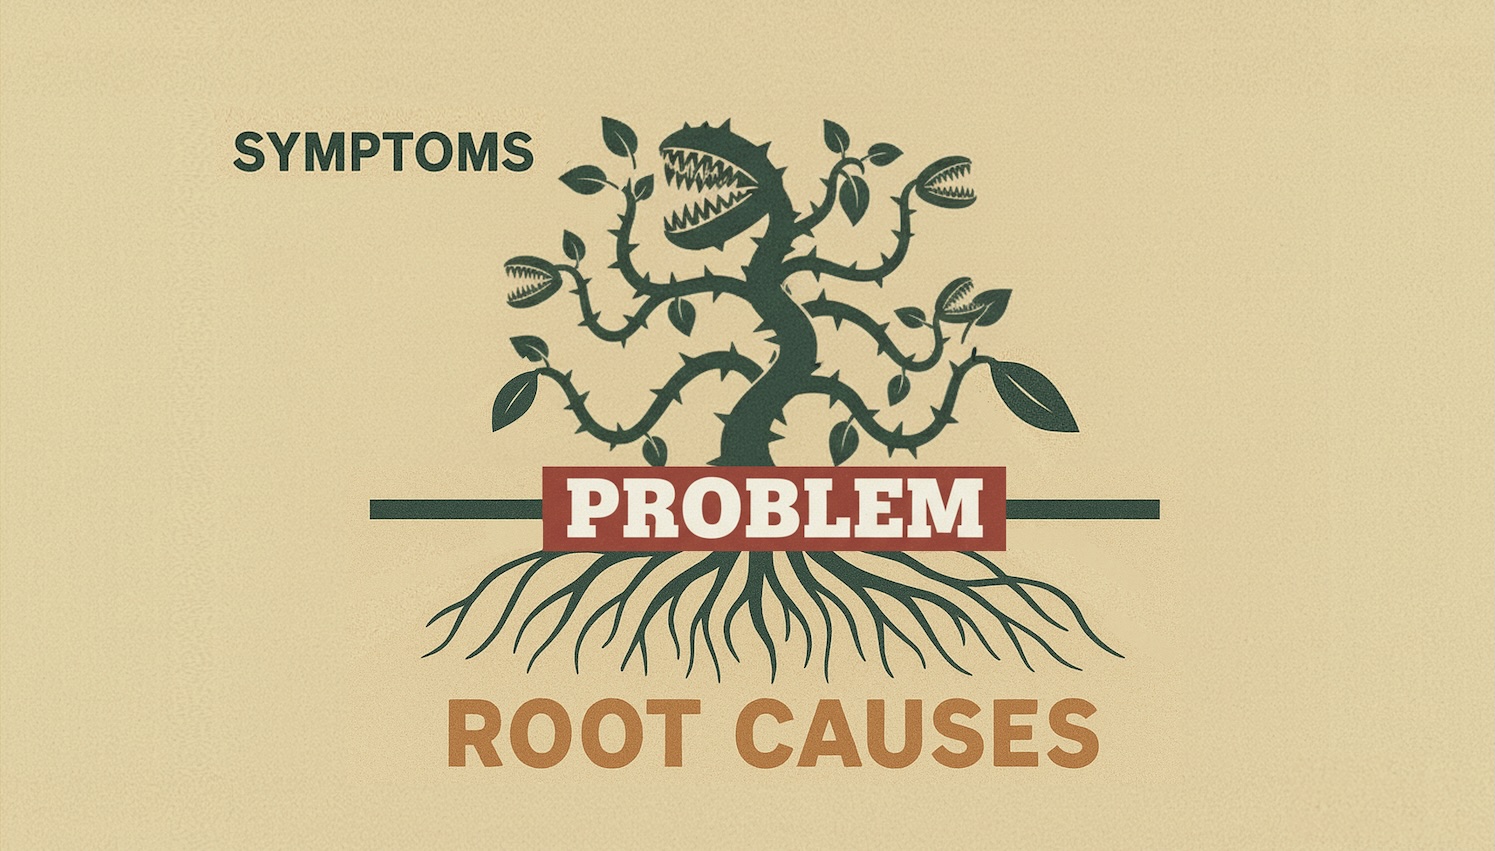
Let’s imagine that we are a team of masons building walls for a building. Unfortunately, some of the walls have defects: they are not straight, there are holes in them, etc. The customers notice this and ask for repairs.
If we apply the same type of solution as before, then would we need more people to perform quality control on the walls that have been built?
Suddenly, it’s obvious: No, of course not! Instead, masons need to learn how to build walls properly!
So let’s see how we can learn to really solve problems and build straight walls 🙂
The scientific approach to problem solving
The rigorous problem-solving approach stems directly from the scientific method (during the Age of Enlightenment). It was popularized in the industrial world after World War II by the famous American engineer Edward Deming under the term PDCA (Plan Do Check Act). He is known as one of the gurus of continuous improvement with his famous wheel:
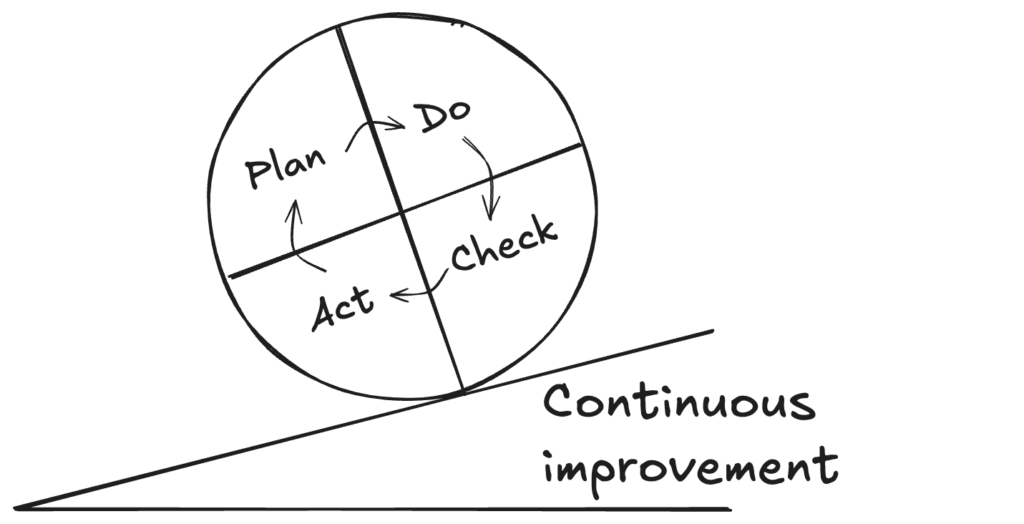
Let’s see how problem solving works by following these four steps:
- Plan: Understanding the Problem
- Do: test countermeasures,
- Check: verify the improvement,
- Act: Reinforce learning.
Step 1 – PLAN: Clearly define the problem
The « plan » stage is not the time to talk about planning, but rather to clearly define the problem to be solved. This is the longest part of problem solving, which consists of:
- frame the problem as a gap,
- look at the impacts,
- and identify the root causes.
But let’s start at the beginning: what is a problem?
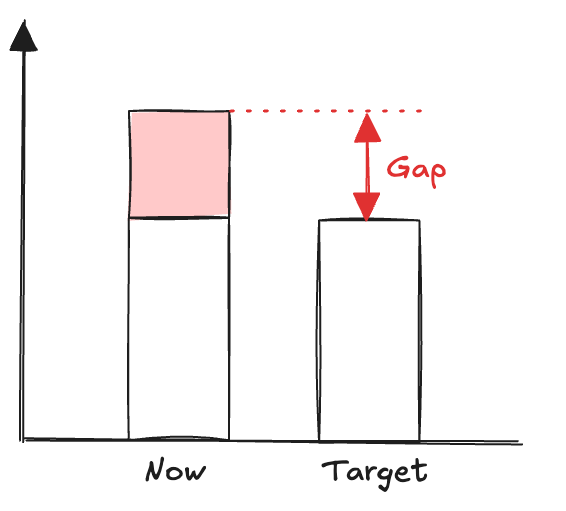
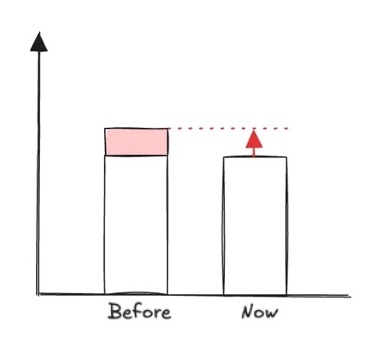
A problem is a gap between the current situation and a desired situation.
PLAN – Set the gap
Visually, it is useful to represent it this way to clarify the problem:
Examples:
| ❌ Not a problem, but rather an opinion. | ✅ Problem |
|---|---|
| There are always bugs. | 27 bugs detected during acceptance testing on the last delivery |
| In IT, you’re always behind schedule. | Over the last 3 months: 3 features delivered 1 week late |
| The platform is extremely unstable. | During the month of June: 3 major incidents 6 minor incidents |
As the excellent Cecil Dijoux often reminds me: problem solving allows us to leave the world of opinions behind and focus on facts.
Okay, so a problem is a measurable deviation and not an opinion—that’s a good start!
PLAN – Measuring impacts
Now, how can we assess the significance of this problem?
To do this, let’s look at the impacts, i.e., the consequences of this discrepancy.
To help us measure these consequences, I look at the impacts from three angles:
- Impacts for the customer
- Impacts for the company
- Impacts for the team
Let’s take a concrete example to illustrate this in software publishing:
Delay = approximately 3 to 5 seconds to display the site’s home page instead of the expected 500 ms
Impacts clients 😕
- Two customers have churned over the last six months due to overall performance, particularly that of the home page.
- Customers are not satisfied with the overall performance of the home page (NPS satisfaction rating reported in 40% of feedback).
Business impact 💸
- Loss of customer = $25,000 in recurring revenue this year
- Difficulty selling due to performance during demonstrations
Impact on teams 😠 😤
- Developers blame Ops for having an undersized platform, and Ops say that the developed pages are not optimized. The atmosphere is tense, and ultimately nothing is being done to improve performance for customers.
Conclusion: we are facing a real problem for the entire company, and it is worth taking the time to understand the real causes and address them.
PLAN – Find the root causes

And now we come to the heart of the matter: identifying the causes… and, above all, the root causes.
Much like a detective, we first formulate hypotheses about the cause in order to identify the root cause(s). Once these hypotheses have been formulated, there is only one solution: go into the field with the people directly involved and look at the code, logs, tickets, etc. And the magic tool here for going beyond the apparent causes and identifying the root causes is the word « why« .
Why did the server crash? Why did the TUs break? Why this null pointer? Why this Out of memory…?
But in most cases, the first answer will not be sufficient. You will need to ask the same question several times to get past the apparent cause and arrive at the root cause. Here is an example to illustrate this reasoning:
Let’s imagine that our favorite application has shut down abnormally, an « application crash. »
Let’s imagine that our favorite application has shut down abnormally, an « application crash. »
Ops: Because the file system is full.
Me: Why?
Ops: Uh, hold on, let me check. Oh yes, indeed, there are lots of application logs in the /logs folder.
Me: Why?
Ops: Looks like there’s no more purging. I’ll check the last run. Oh yeah, it’s been over a week… Weird?
Moi: Pourquoi ?
Ops: Hold on, I’ll ask a developer… Indeed, they found a regression in the latest purge batch delivery. It’s no longer purging…
Me: Why?
Ops: Ils disent que dans un edge case (exception), on ferme mal la transaction en base données et ça plante le batch.
That’s it, we FINALLY have the root cause: an error in the code on exception handling that causes a database error: transaction remained open. In general, after five attempts (The 5 Why), we arrive at the root cause, which very often corresponds to two cases:
- I didn’t know (that I had to close the transaction)
- I forgot (that I had to close the transaction)
We’ve probably all experienced the second reason for the shutdown: the file system is full → we delete the logs and restart the application. Of course, a few weeks later, the application will crash again for the same reasons…
This example highlights the importance of following through with the process to identify the root cause and permanently eradicate the problem.
The PLAN stage is now complete. It may seem long, but with a little practice, you can clarify any problem using this approach in 10 to 15 minutes.
Step 2 – DO – A little less conversation, a little more action!
Now that the root causes have been identified, all that remains is to find countermeasures to test. We are not talking about solutions here, as we do not yet know whether they will have the desired effect.
The principle is to identify which countermeasures to apply for each root cause. Once again, our brains play tricks on us, and I often see countermeasures that have nothing to do with the root causes identified previously: for example, a classic example is trying a tool that will solve the problem for us.
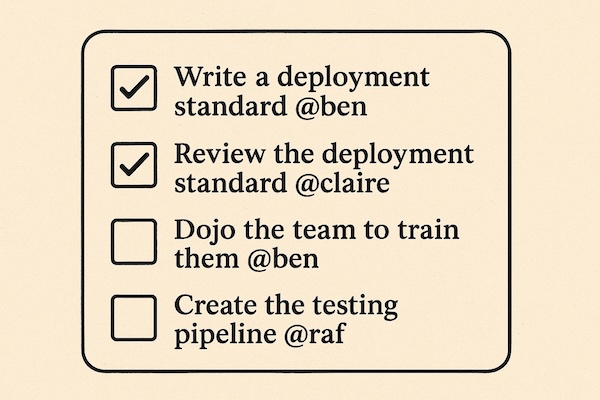
In our example of the server crashing, we can imagine several possibilities. If it is a particularly incident-prone piece of code:
- Organize a dojo so that the team can improve their skills in this area of code.
- Add automatic TU/TI tests to test certain edge cases.
- Add static code checks such as Sonar or others.
- Comment on this part of the code to provide tips for future developers.
- Improve detection/monitoring: when the file system is at 80% → automatic log relocation.
- …
The challenge here is to really implement the countermeasures all the way through: don’t let up.
To achieve this, the key is to have an owner for each countermeasure and to implement them as quickly as possible. The team leader plays a vital role in ensuring that the team sees these improvements through to completion and does not lose focus by shifting attention to a more recent problem.
Step 3 – CHECK: Does it really work?
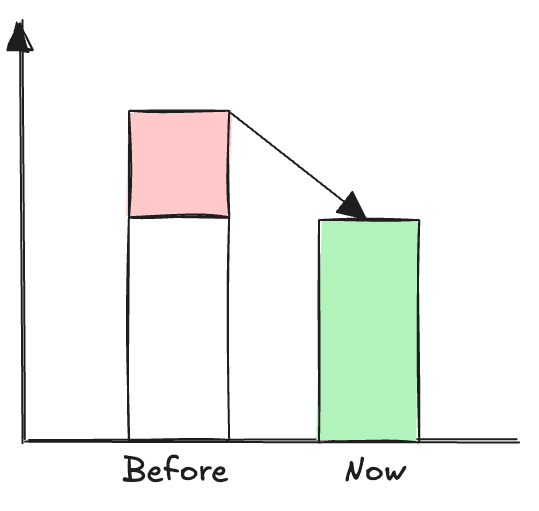
This is the focus of our next step: did the countermeasures have the desired effect? And it is at this stage that framing the initial problem as a gap makes perfect sense.
There are two possibilities:
- Either the gap has not completely disappeared, the situation has improved but we are not yet at the target.
We are on the right track but we have probably missed some root causes or the countermeasures have not all worked as planned. We therefore need to carry out a new iteration by analyzing the causes and ideas for countermeasures.
- Either we are on target. Well done, we can move on to the final step!
Step 4 – ACT: What did we learn in the end?
It would be a shame to miss this final step, which consists of recognizing the progress made and internalizing it (anchoring it deeply within ourselves).

That’s the magic of problem solving. Initially, it’s practiced to overcome obstacles, but ultimately, it develops the expertise of people.
To reinforce learning, reformulation is necessary. Among my practices and those of my team:
- Share the solution to the problem during the daily meeting or with several colleagues.
- Share it during an all-hands meeting in front of the entire team.
- Organize a dojo (a kind of mini-training session in the field) to share this new practice.
- Or even write a blog post!
Following the four-step process when telling your story helps you realize how far you’ve come.
Pitfalls to avoid
Some fairly common mistakes that I observe in the field:
- Leave problem solving to the experts/team leaders/scrum masters
Problem solving is everyone’s business, and everyone needs to be coached, ideally by the team leader. - Pointing fingers at the people who were involved in the root causes: « It was Xxxxx who ruined production! » The consequences of finger-pointing are immediate: no one will talk about the problems anymore, and one thing is certain, they will be around for a long time…
- Waiting for the end of the sprint, waiting for the next retrospective (the most common approach), waiting until next week… A problem that has been « rehashed » loses its impact; the more immediate it is, the better.
- Be concise when writing your problem solution: no long sentences, just extremely precise bullet points. Ideally, one A3 page or two to three screen pages should be sufficient. This forces you to summarize, which also allows you to use your problem solution as a communication tool for sharing (during the Act).
Where to begin?
To try out this approach, here are a few recommendations:
- Start with a simple problem. Like any new skill, whether it’s cooking, playing the piano, or running, you have to start with something simple.
- Choose a problem that is within your reach, i.e., one that you can tackle on your own without needing other cross-functional teams or your manager.
These selection criteria will encourage you to continue, buoyed by these initial successes. Nothing is more satisfying and encouraging than seeing the effects of these initial improvements, which may seem insignificant but enable you to get started.
In a future article, I will share some problem-solving techniques in the field of software development to reduce the number of bugs during agile retrospectives, as well as in the field of infrastructure for incidents.
How do you help your teams solve everyday problems? What approach do you take when you encounter « tech manager » issues?
For those who prefer video, you can find the same approach here:
Short
Long
Laisser un commentaire